I have received a number of emails and calls from my friends asking for some text to speech web tools and i am being tired to reply them individually and I am sorry for this late answer but late is better than never. One thing I am sure of though : I will never ignore your email and no matter how late I am in the answer I will come back to you so please bear with me.
Below is a list of some great web tools that allows you to convert text into speech. This is a great way to relax your tired eyes especially after a busy day of teaching. All of these tools are very simple to use and have a user friendly interface. Check them out below and let us know what you think about them. Enjoy
1- Announcify
Announcify reads out loud every website you want. For example, if you're too tired but still need to study one more Wikipedia entry, Announcify can help your tired eyes relax.
2- Fox Vox

"FoxVox will speak any text you highlight in a web page. FoxVox can also create audiobooks in mp3, ogg, and wav formats. You can now easily turn your blogs and articles into podcasts."
3- Natural Reader

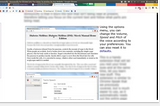
4- Balabolka

Balabolka is a Text-To-Speech (TTS) program. All computer voices installed on your system are available toBalabolka. The on-screen text can be saved as a WAV, MP3, MP4, OGG or WMA file. The program can read the clipboard content, view the text from AZW, CHM, DjVu, DOC, EPUB, FB2, HTML, LIT, MOBI, ODT, PRC, PDF and RTF files, customize font and background color control reading from the system tray or by the global hotkeys
5- Chrome Speak
"Chrome speak provides native support for speech on Windows (using SAPI 5), Mac OS X, and Chrome OS, using speech synthesis capabilities provided by the operating system. On all platforms, the user can install extensions that register themselves as alternative speech engines."
6- Odiogo

7- Power Talk

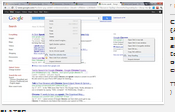
8- QR Voice

9- Select and Speak

"Select and Speak uses iSpeech's human-quality text-to-speech (TTS) reads selected text. It includes 43 iSpeech text to speech voices. You can configure the voice and speed option by changing the settings at options page
"
10- Speak It

11- Text to Voice
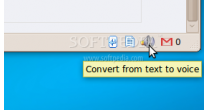
TTS gives Firefox the power of speech. Select text, click the button on the bottom right of Firefox window and this add-on speaks the selected text for you. Isn't it brilliant? Audio is downloadable.
12- Text 2 Speech

13- VozMe

Voz Me is pretty much similar to QR Voice. It is very easy to use and has a simple interlace. Just type in your text and click to hear it spoken to you.
You might also like:


 The
The 
 Lists Personal Folders files (.pst) that will be included in the backup.
 Displays the last time a backup was completed.
 The
The  You can open previously created backups.