How to Install Ubuntu


  1. 1
Using a DVD?
BootFromCD

  • A common power-on BIOS screen(notice the 'press DEL for setup' message)
  • A typical BIOS boot menu screen
PC requires you to hold down or press a key to boot from CDbiosbootmenu.png
  • Apple Computers and others: Hold down the C key while rebooting. Toshiba, IBM and others: press F12 while booting to get to the boot menu and choose CD-ROM. Asus and others: press TAB key while booting and select CD-ROM from boot menu.
CD/DVD drive can't boot in AHCI/Raid mode
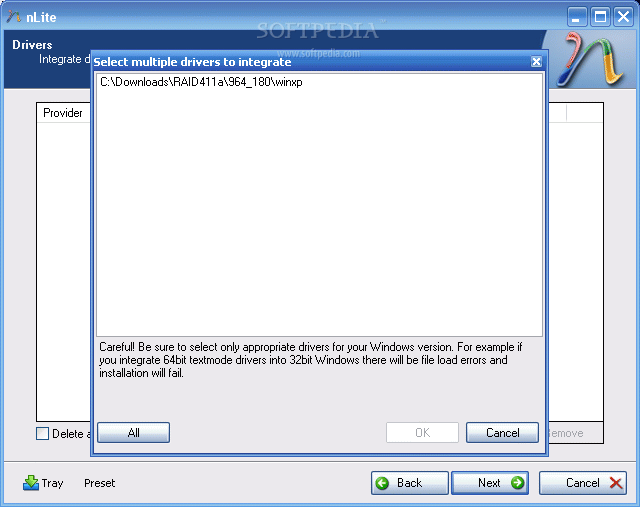
Multiple CD/DVD drives in your computer
BIOS does not have the option of booting from CD/DVD drive
CD drive not capable of booting a CD (older drives)
  • Purchase or borrow a newer CD-ROM drive.
After I Select: 'Start or Install Ubuntu', it fails to boot
  • Press F6 for "Other Options." Try to apply boot parameters:
Other Installation Options
Using a USB drive?
  1. 2
Prepare to install Ubuntu
  • We recommend you plug your computer into a power source
  • You should also make sure you have enough space on your computer to install Ubuntu
  • We advise you to select Download updates while installing and Install this third-party software now
  • You should also stay connected to the internet so you can get the latest updates while you install Ubuntu
  • If you’re not connected to the internet, we’ll help you set up wireless at the next step
  1. 3
Set up wireless
  1. 4
Allocate drive space
  1. 5
Begin the installation
  1. 6
Select your location
  1. 7
Select your preferred keyboard layout
  1. 8
Enter your login and password details
  1. 9
Ubuntu One
  1. 10
Learn more about Ubuntu while
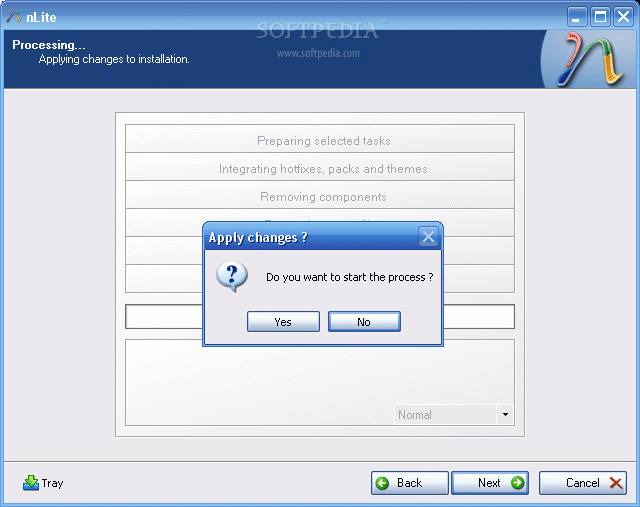
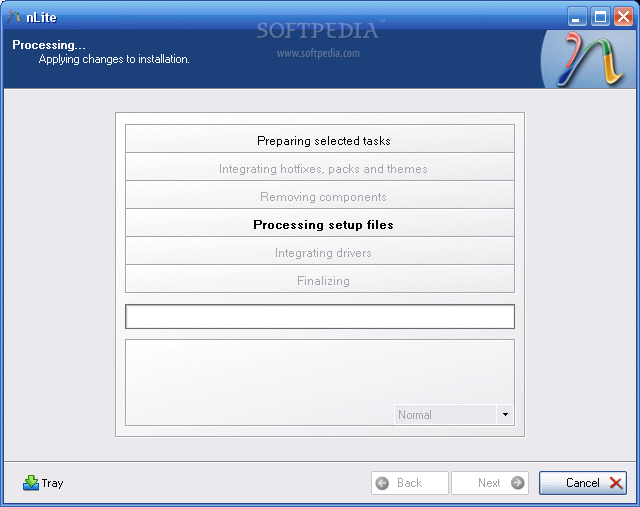
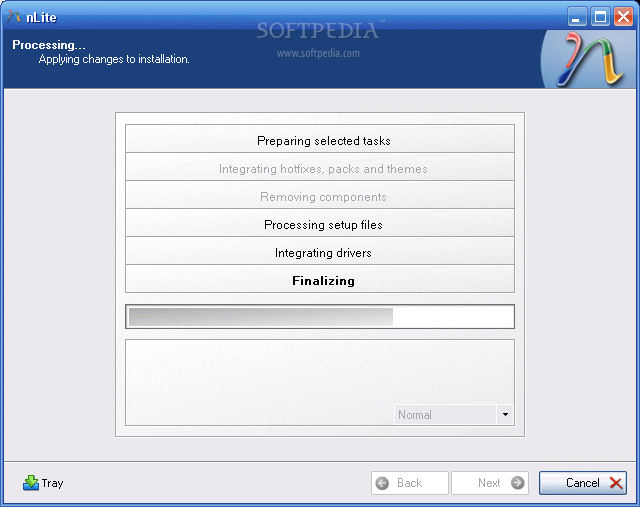
the system installs…
  1. 11
That’s it.
  1. It’s easy to install Ubuntu from a DVD. Here’s what you need to do:
    Put the Ubuntu DVD into the DVD-drive
    Restart your computer. You should see a welcome screen prompting you to choose your language and giving you the option to install Ubuntu or try it from the DVD.
    If you don’t get this menu, read the booting from the DVDguide for more information.

IconsPage/disc.png When installing or trying the LiveCD version of Ubuntu from a CD, your computer has to be able to boot from that CD. Usually this consists of just inserting the disk into your CD/DVD drive and rebooting your computer. Sometimes though this doesn't work, or just not as expected or planned. Here are some common problems and how to fix them.
Check and make sure that the disk was burned properly. If you bought an original CD from a (web) store, then you should not have to worry about this section. If you have not yet burned the downloaded ISO image from the Official Ubuntu Download Page to a disk, then head on over toBurningIsoHowto for directions.
In your current operating system when you navigate the CD that you burned, you should see multiple directories and files, not the single .iso file. If you see just the single .iso file when browsing to the CD, it has been improperly burned and you will have to burn it again following the instructions atBurningIsoHowto.
    • correctcd.png
  • Incorrect CD file display. You will have to burn it again following the following instructions at BurningIsoHowto.
    • incorrectcd.png
Some computers are set to boot directly from the hard drive. This should be as simple as entering the BIOS, enable booting from the CD-ROM drive, and making sure that the CD-ROM is before the hard drive in the boot order.
The most common way to enter the BIOS is to press the DELETE key when the computer is first booted(this seems to be becoming standard). On other systems it could be a different key, or combination of keys like ESC, F1, F2, F10, F12, Ctrl-Esc, Alt-Esc, Ctrl-Alt-Esc, Ctrl-Alt-Enter, Ins or even others. You might have to press, press and hold, or press multiple times. The best way to find out the details of that is to look in the users manual or search the manufactures website. A few different Bios screens.
    • poweronbios.jpg
Some computers require you to hold down or press a key to enable booting from the CD drive, the best place to find this information is in your computers user manual or the manufactures website. Here are some common keys to try if you lack that information.
    • escbiosbootmenu.png
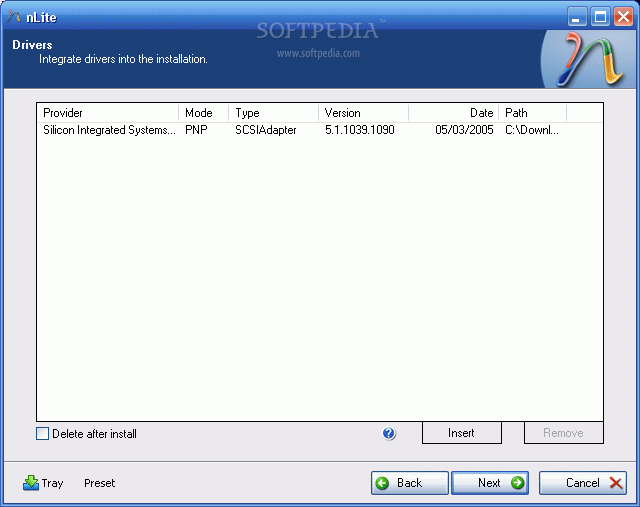
A large number of CD/DVD drives have problems running under AHCI/Raid mode (from not working at all to refusing to boot).
Either plug drive into another SATA port that isn't set to AHCI/Raid or if that can't be done go into BIOS and set mode of SATA ports to IDE/Compatibility mode.
(WARNING: if your Boot drive is plugged into same group of ports it may fail to boot after change(and obviously any Raid arrays will fail also)).
Some computers will only allow booting from one CD or DVD drive even though you have 2 or more CD/DVD drives. So try the disk in each of the drives while rebooting the computer.
Some manufacturers provide BIOS updates that can correct this issue. For a BIOS update, please check with the manufacturer.
A workaround is available if you can read from your CD-ROM drive, but can not boot from it. You may be able to use the SmartBootManager on a floppy disk to force your computer to boot from the CD-ROM drive.
Some drives are just too old and do not support booting and will require you to:
If you have arrived at this prompt, you have successfully booted from the CD. But if you can not get any further, you may want to try some optional bootParameters to get you running.
If unfortunately none of these options worked for you, there are still other options. Please take a look at 'Installation without a CD' and 'Network Installations' on the Installation page.


Most newer computers can boot from USB. You should see a welcome screen prompting you to choose your language and giving you the option to install Ubuntu or try it from the CD.
If your computer doesn’t automatically do so, you might need to press the F12 key to bring up the boot menu, but be careful not to hold it down - that can cause an error message.
  1. If you are not connected to the internet, you will be asked to select a wireless network, if available. We advise you to connect during the installation so we can ensure your machine is up to date. So, if you set up your wireless network at this point, it’s worth then clicking the Back button to go back to the last screen (Preparing to install Ubuntu) and ticking the box marked ’Download updates while installing’.
  1. Use the checkboxes to choose whether you’d like to Install Ubuntu alongside another operating system, delete your existing operating system and replace it with Ubuntu, or — if you’re an advanced user — choose the ’Something else’option
  1. Depending on your previous selections, you can now verify that you have chosen the way in which you would like to install Ubuntu. The installation process will begin when you click the Install Now button.
    Ubuntu needs about 4.5 GB to install, so add a few extra GB to allow for your files.
    Not sure about this step? Windows users can use the Windows installer, which will install and uninstall Ubuntu in the same way as any other Windows application. It’s simpler and completely safe.
  1. If you are connected to the internet, this should be done automatically. Check your location is correct and click’Forward’ to proceed. If you’re unsure of your time zone, type the name of the town you’re in or click on the map and we’ll help you find it.
    TIP: If you’re having problems connecting to the Internet, use the menu in the top-right-hand corner to select a network.
  1. Click on the language option you need. If you’re not sure, click the ’Detect Keyboard Layout’ button for help.
  1. …or make a cup of tea!
  1. All that’s left is to restart your computer and start enjoying Ubuntu!

Installing Windows XP on a SATA hard drive

Installing Windows XP on a SATA hard drive is not a straight-forward task as Windows XP does not recognize the SATA drive. In order to install operating systems such as Windows XP on SATA drives, the latest SATA drivers are required.Download SATA drivers for the motherboard from the website and integrate them with the XP installation CD using software such as nLite. SATA drivers can also be installed as third party drivers; you will be prompted during the installation process. Without proper SATA drivers, installing Windows XP on a SATA hard drive is not possible as SATA mode would have to be disabled in the BIOS to continue with the installation. 

Install Windows XP on a SATA drive


  • Check out the make/model of motherboard
  • Installing Windows
    • You have a floppy drive
    • You do not have a floppy drive
  • Alternative
  • See also: Windows xp sata

Installing Windows XP on a Serial ATA hard drive is not an easy task, because the system does not recognize SATA drivers at startup. Windows XP Pro SP2 fares a little better with SATA drivers, but here is what can be done in cases where the driver is not recognized. 

Check out the make/model of motherboard

Above all, it is necessary to get the latest stable Serial ATA drivers for your motherboard. To do this, it is essential to know the exact model of motherboard. If you still have the manuals, you can refer to it in order to identify the make and model of the motherboard. 

Download the SATA Drivers

Visit the official website of the manufacturer and download the drivers for the Serial-ATA controller of your motherboard and save them to a floppy disk (if you have one!) after unzipping them. 

Installing Windows

Two scenarios are possible: 

You have a floppy drive

After setting the BIOS to boot on the CD-ROM or DVD-ROM, insert the Windows installation CD and follow the steps to install Windows XP. When Windows prompts you (shown at the bottom of screen), press the F6 key to install the third party drivers for the Serial ATA hard drive 

You do not have a floppy drive

In this case, you need to unzip the drivers for the SATA controller and use the nLite software to integrate them on the Windows XP installation CD. This way, XP will be able to recognize your SATA drive. 

Alternative

If you can not find the proper SATA drivers, or the above tips do not work for you, a final solution is to disable the SATA mode from the BIOS, but this can decrease the performance of your hard drive.
  • Access the BIOS setup.
  • Navigate the BIOS and look for the option to disable SATA.
  • Save the BIOS option, and restart the installation of Windows XP.
  • If you can not find this option, a BIOS upgrade may solve your issue
  • Important: If you want to install XP in dual boot with Vista, disabling the SATA controller can sometimes cause a malfunction on Vista. It is advisable to check if Vista is still functional before starting the installation of XP.


Install Windows XP on SATA without a Floppy (F6)

SATA hard drives have become more and more appreciated tending to substitute the IDE drives due to the increasing speed they offer. Motherboard manufacturers started to implement the new standard years ago, when thetechnology was young and expensive. Now, as the SATA HDD prices have lowered to a level where anybody can afford to choose a SATA enabled HDD instead of an IDE one, a great migration has been observed among the common computer users. 

They choose to install Windows and applications on SATA drives because they provide more speed which determines the system to run smoother. Thus, for those owning older mainboards with SATA support an extra step is required while attempting to install Windows XP. Windows XP does not provide drivers for all the SATA controllers, therefore, during the installation procedure, the user must insert a floppy with the drivers that came in the package along with the motherboard. 

Not a big deal, not much effort, but the funny thing is that a great number of people passed on their floppy drives. Under these circumstances, no floppy means the impossibility to install Windows XP on SATA (on some mainboards). The result? The installation guide simply won't detect the SATA HDD.

People that were happy they got rid of the old removable drive have now motives to worry. Some may reconsider buying new floppy drives for their computers. Even if I wrote in a precedent article about the utility of the floppy drive, I do not encourage spending your money buying back an obsolete piece of hardware. I will present you a method to avoid this inconvenient by doing a software trick.

Let's take it slow. Where is the problem? We have a driver problem strictly because the SATA driver we need does not come embedded in the Windows XP installation package. What if we add the driver by ourselves before installing Windows?

What ingredients are involved in this operation? The original Windows XP Installation CD, a freeware application namedNLite and a blank CD. Moreover, we need the drivers for the SATA controller provided by the manufacturer. In case you did not find any floppy inside the motherboard package or you cannot locate them on the mainboard installation CD, you can consult the manufacturer's
 website to download the latest versions. To do the trick I have been talking about, it is assumed that you already have a Windows installed on an IDE drive. In case you don't, pay a visit to a friend and ask him to let you use his computer. It won't take too much time, I guarantee. 

So, download the drivers and unzip them (in case they come archived) in a desired location. Then download and install the Nlite application. When you start the Nlite application, you will be asked to provide the location for the Windows installation package. Insert the genuine Windows Installation CD into the CD drive and, inside the application, select the CD drive letter. 

To insert the SATA drivers within the installation package, you need to have it saved on the HDD. Hence, when the warning window appears click OK and select the destination folder for the files to be saved. Make sure that the destination partition / HDD has enough space to store the contents of the installation CD. 

I tested a Windows XP Home Edition and it seems that it required about 566 MB. Immediately after you have chosen the destination folder, the application will start copying the Windows installation files. When finished, it will display some version information regarding the newly copied Windows Installation Package. 

Now, click next twice until you get to a screen where you get options sorted in 4 categories: Integrate, Remove, Setup, Create. We are interested in the integration procedure, therefore select the Drivers button and click next. From the next menu window, click Insert and select multiple drive folder option from the drop down menu. This option permits you to browse to the location where the downloaded drivers are found.

Select the containing directory and click next. You will get a list with the available drivers (in case there are more than one) or simply one driver. Select it (them) and click next. Now the application will ask for the permission to start the integration procedure. Choose Yes and wait for the drivers to be inserted into the installation package.
Review imageReview imageReview imageReview imageReview image

Review imageReview imageReview imageReview image


With problematic driver being included in the installation package you can install Windows XP on your SATA HDD...but...the installation package is on the HDD. You need a bootable CD in order to start an installation. Don't worry, once the installation package has been adorned with additional user selected drivers it can be transformed into a bootable disk image and later burned on a CD. To encapsulate the installation into a ISO image use the same Nlite application. 

Open it, make sure the HDD installation folder is selected and click next. Select "Last session" preset and click next again. Now from the options menu choose Bootable ISO and click next. In the following window, make sure that the mode is set to "Create Image" and click Make ISO. A destination folder is required where the resulting ISO image will be saved. Once the image saving process finished you have the freedom to burn it on a blank CD with whatever you favorite CD burner software may be.
Review imageReview image


The new CD will be the twin copy of the Windows Installation CD but with one difference, it includes the SATA driver.